A privacy fence is one of the most impactful upgrades you can make to your property. It defines your space, blocks unwanted sightlines, keeps kids and pets contained, and adds real value to your home. But before you start digging post holes or calling contractors, there's a fundamental question to answer: should you build it yourself or hire a professional?
This guide walks you through how to build a privacy fence from both angles - what the DIY process actually involves and how it compares to working with a professional fence installer - so you can make the right call for your property, your budget, and your time.
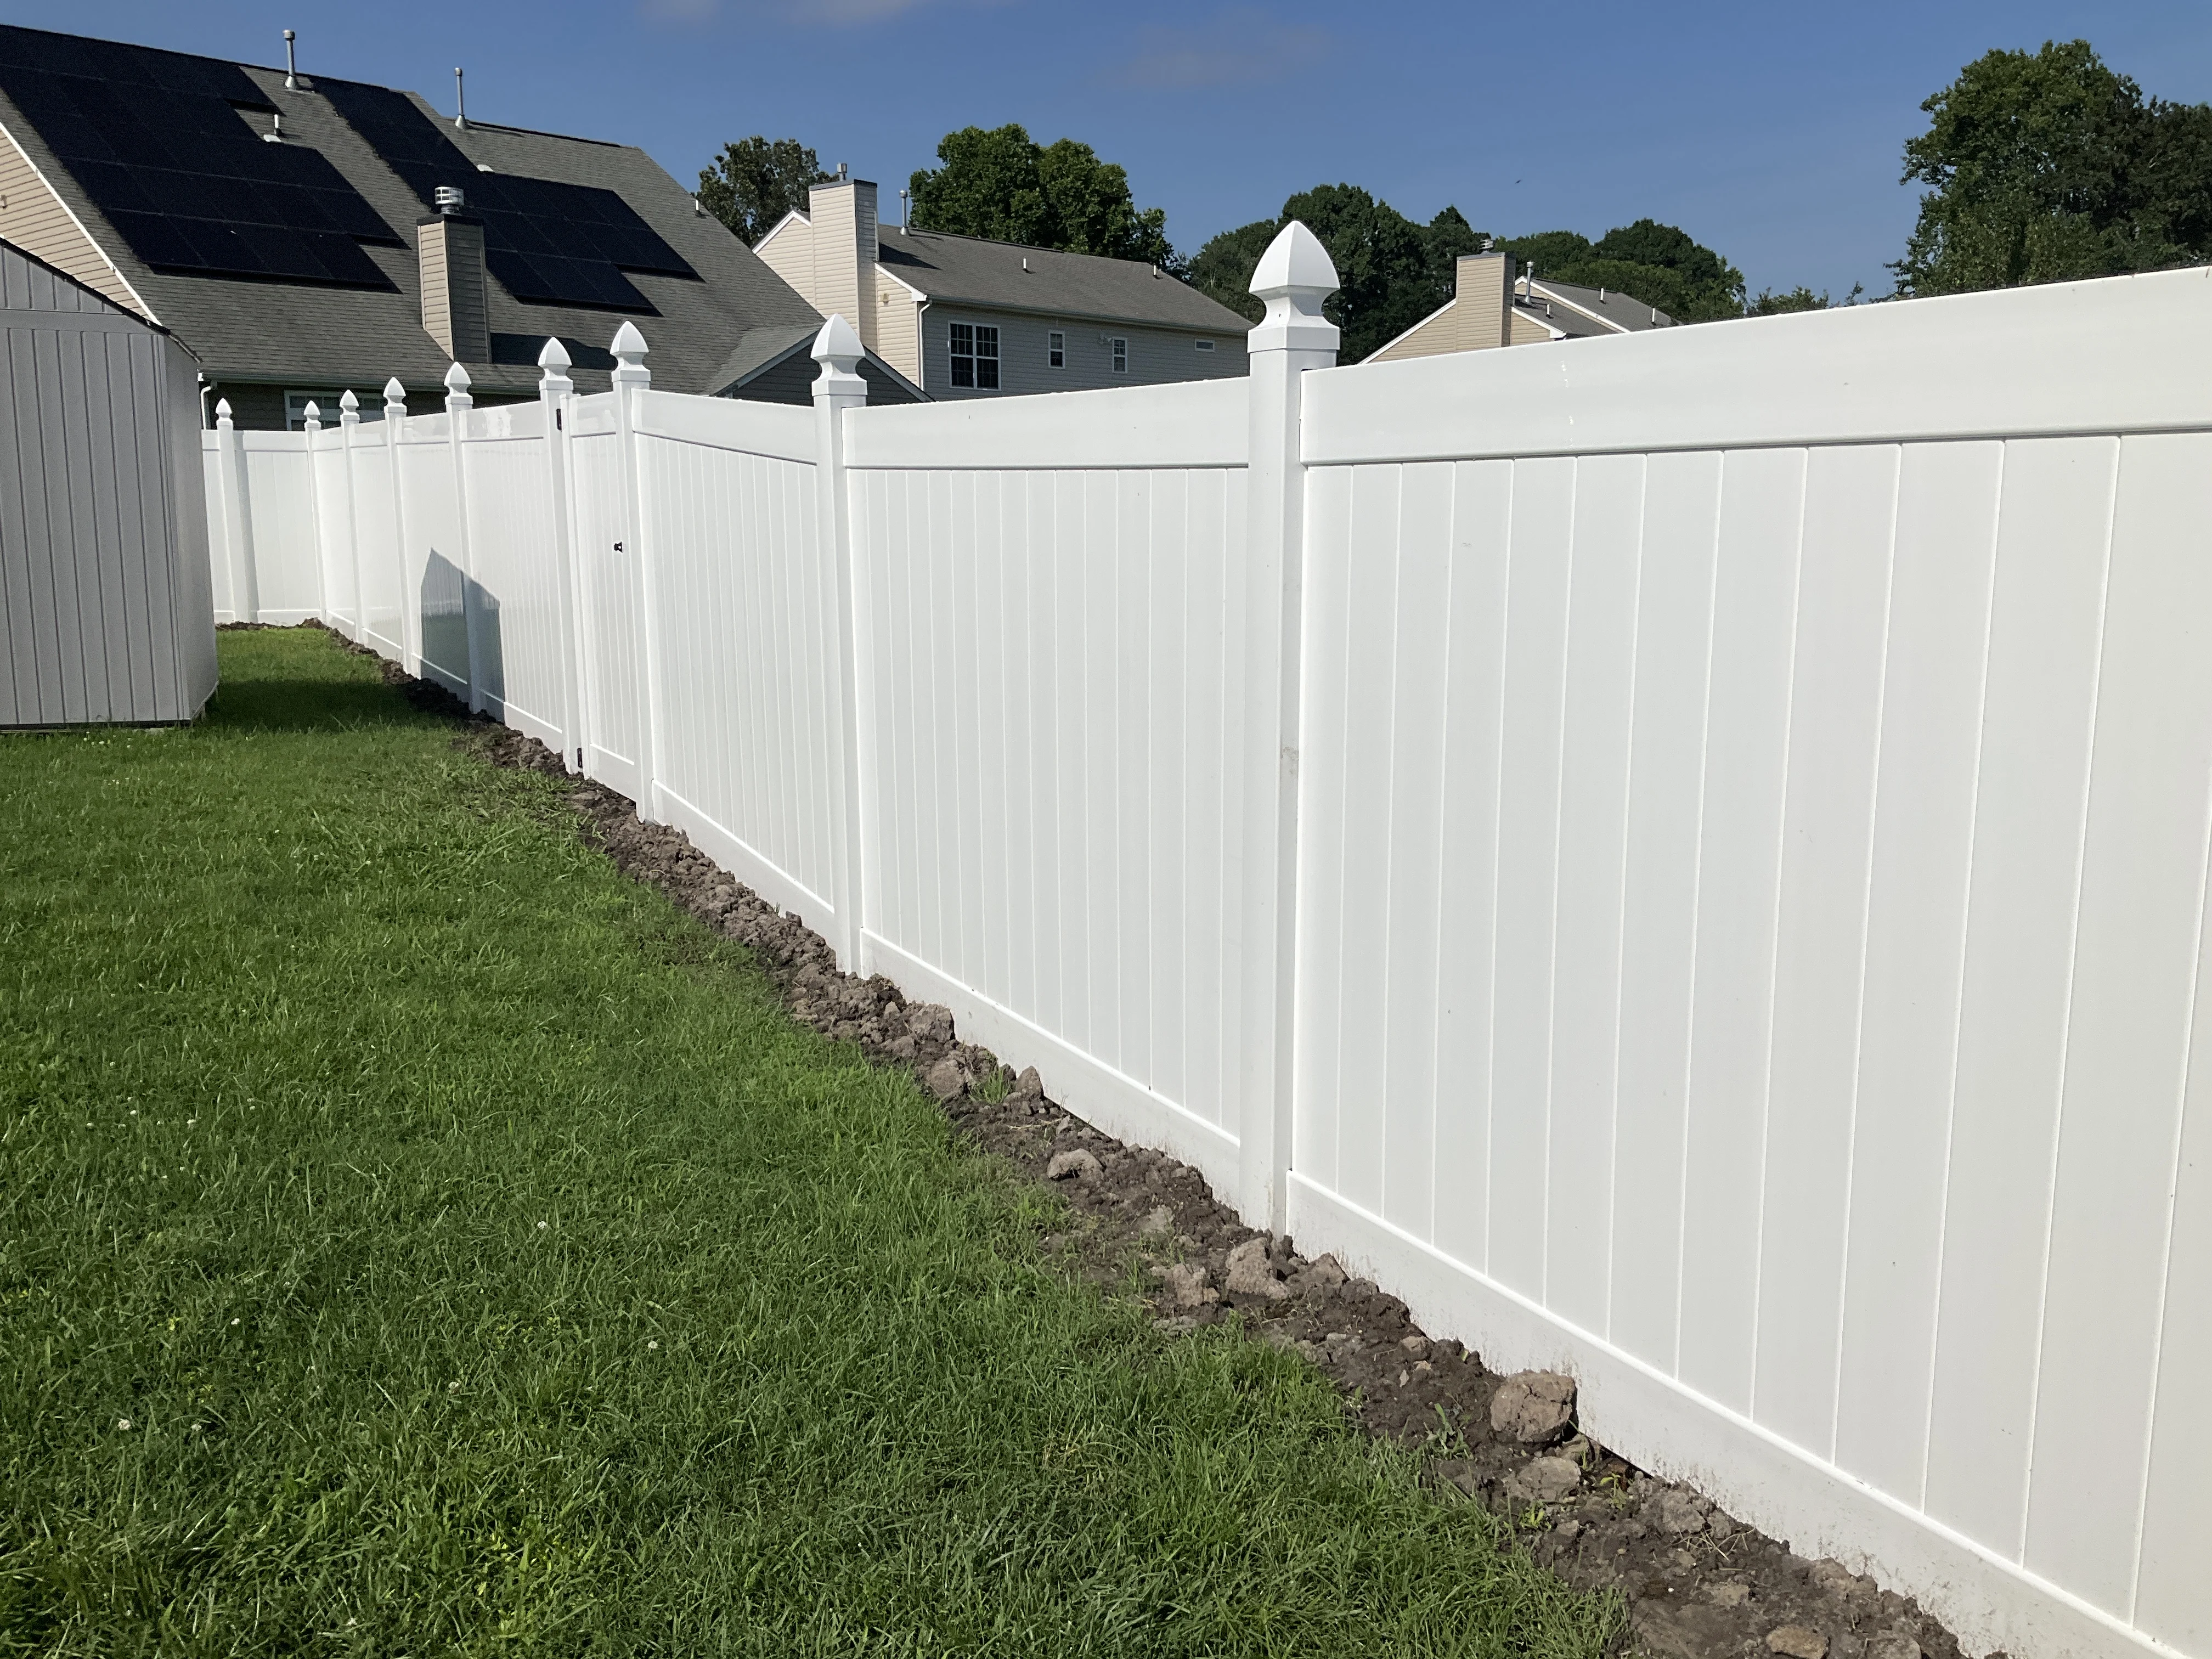
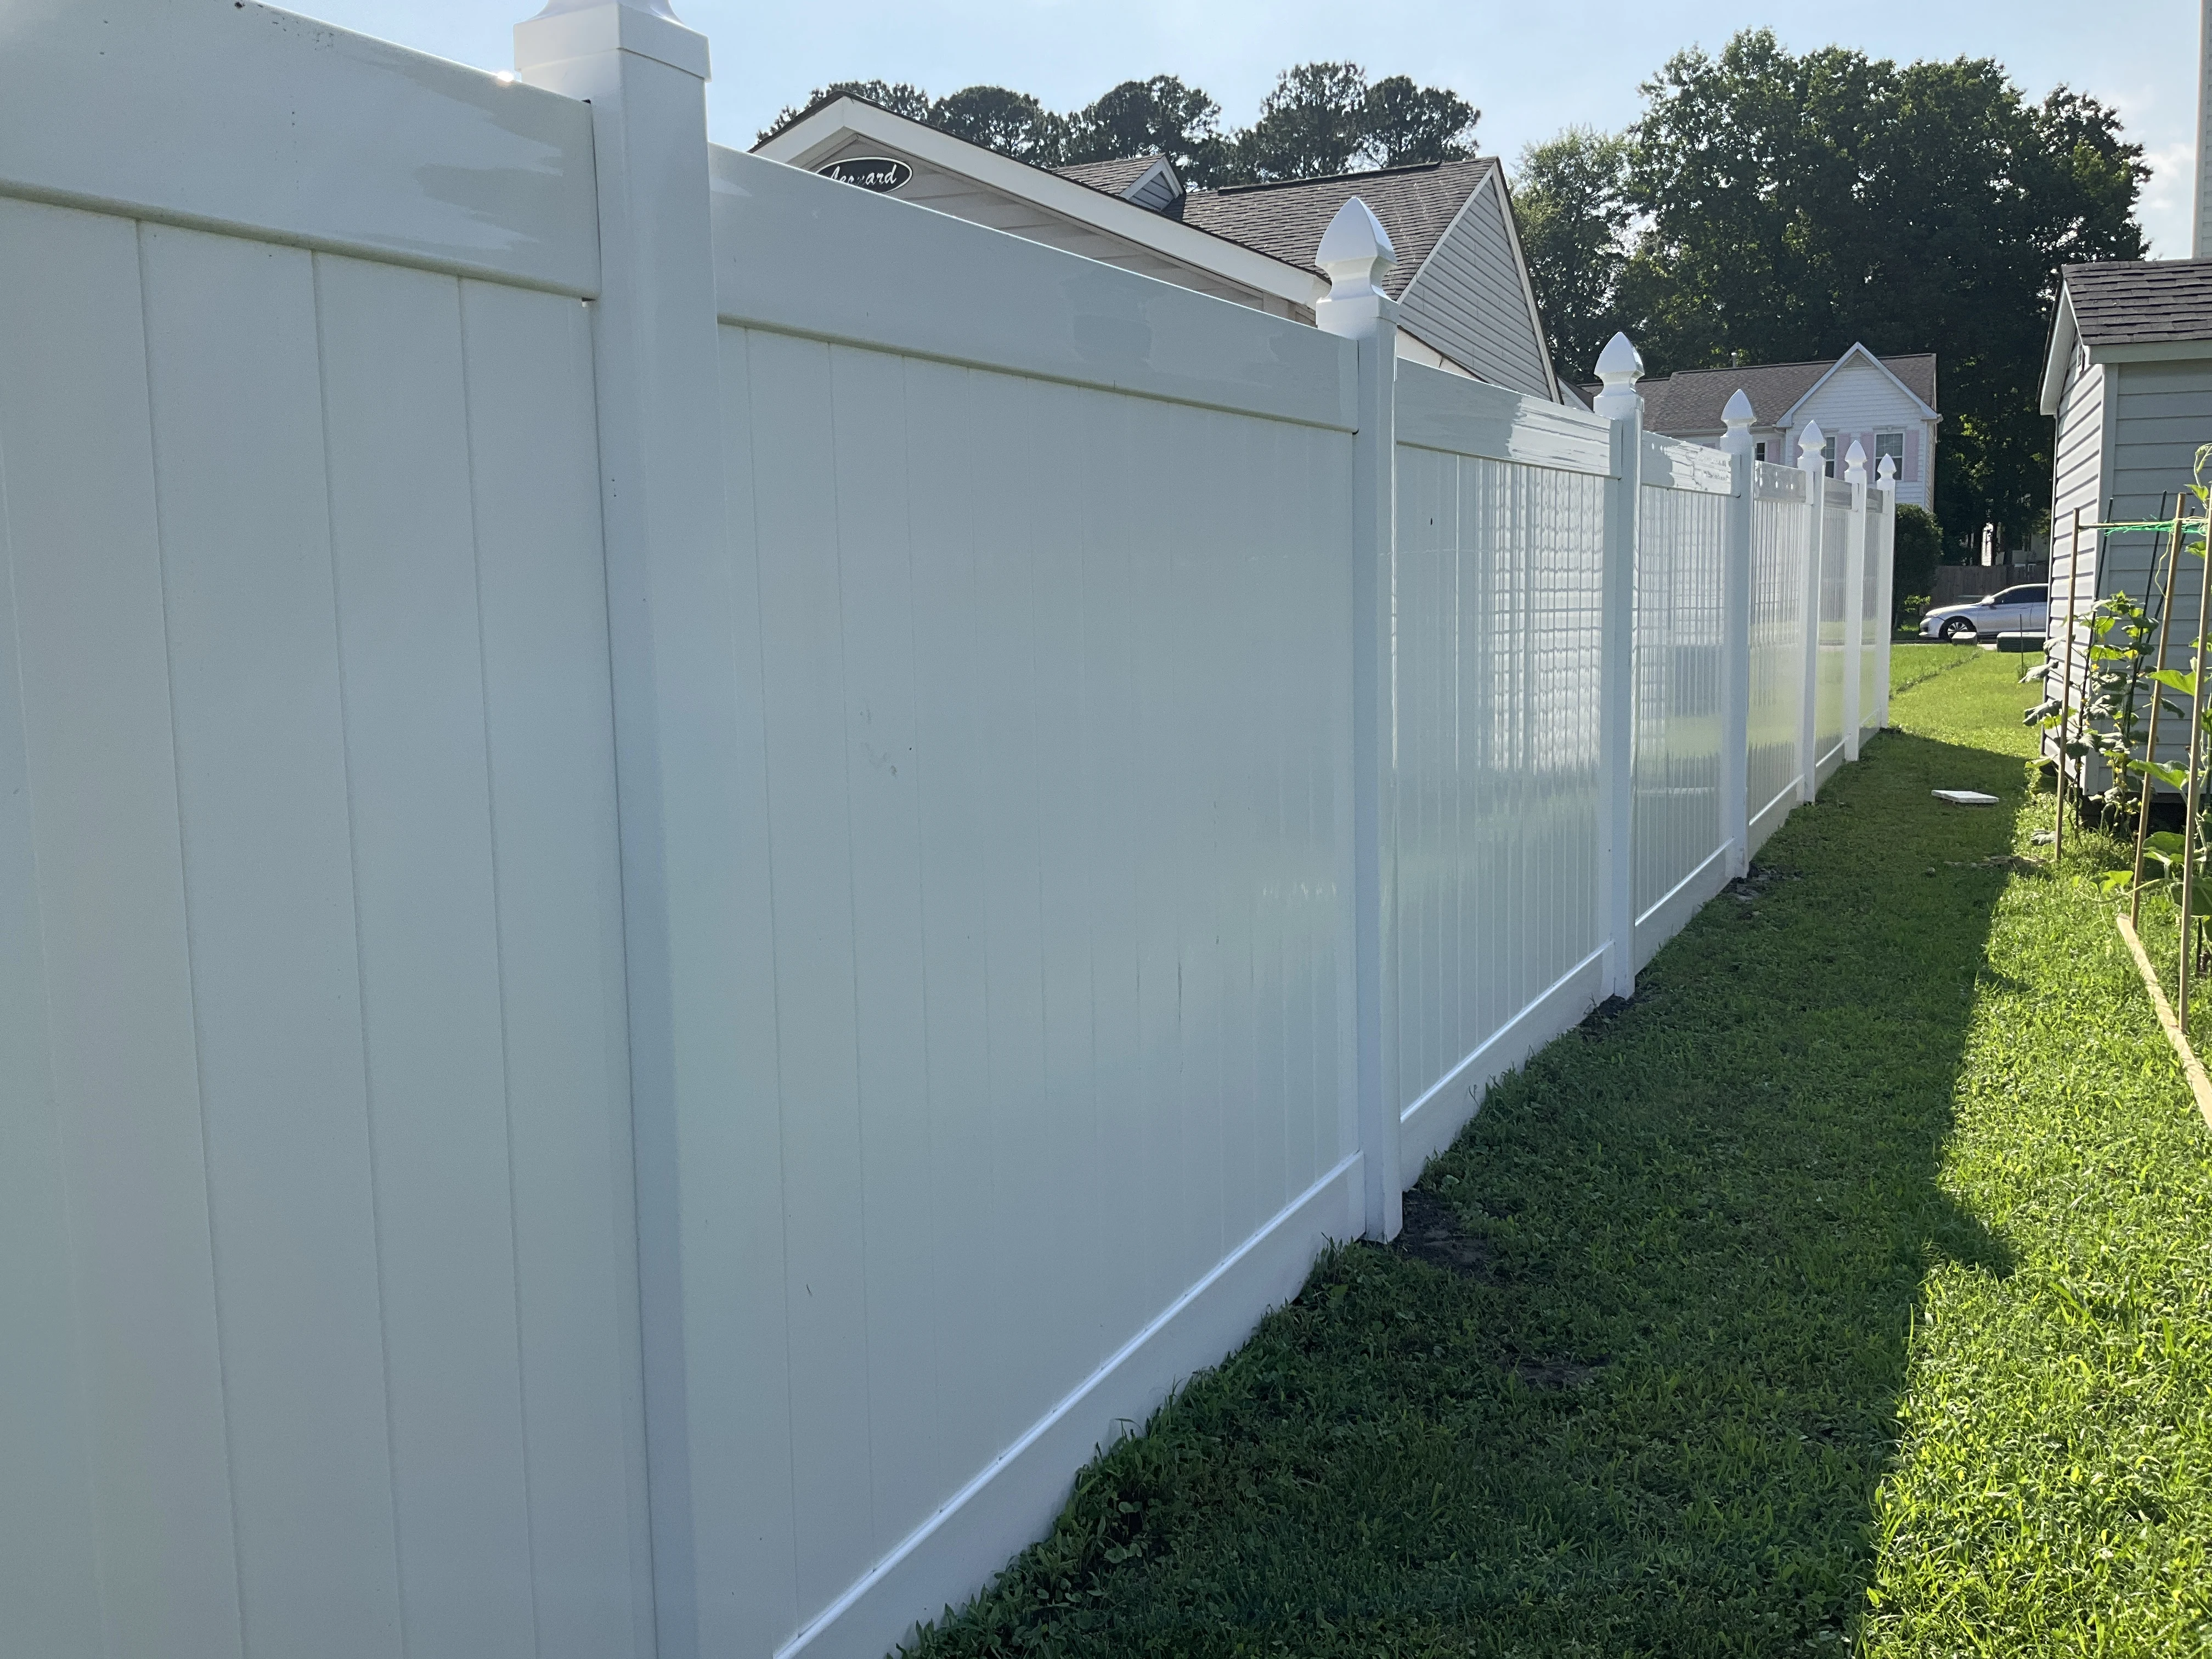
A privacy fence is a solid, close-boarded fence typically built to six feet in height, designed to block visibility from neighboring properties and the street. The most common materials for privacy fence construction are wood, vinyl, and composite.
Wood is the most popular choice for DIY privacy fences. Cedar and pressure-treated pine are widely available, relatively affordable, and easy to work with using standard tools. Vinyl offers a cleaner, lower-maintenance finish but requires more specialized installation techniques and pre-manufactured panels that limit customization.
For the purposes of comparing DIY vs professional installation, this guide focuses primarily on wood privacy fences - the most common type homeowners attempt to build themselves.
Building a privacy fence yourself is a genuinely achievable project for a capable DIYer. It requires time, physical effort, the right tools, and careful planning. Here's what the process involves from start to finish.
Before buying a single board, you need to know exactly where your fence will go. This means confirming your property lines - not estimating them. A survey plat from when you purchased your home is a starting point, but if there's any doubt, hire a licensed surveyor. Building even a few inches over your property line can result in a legal dispute and a requirement to tear the fence down at your own expense.
Once property lines are confirmed, mark the fence line with stakes and string. Identify post locations - typically every six to eight feet - and mark them clearly.
Most jurisdictions require a permit for fence construction, particularly for fences over four feet in height. Check with your local building department before breaking ground. If your property is governed by an HOA, review the rules around fence height, material, color, and placement. Skipping this step can result in fines or a forced removal after the fence is already built.
In the United States, calling 811 before any digging is a legal requirement. The 811 service dispatches utility locators to mark underground gas, water, electric, and cable lines on your property at no charge. Hitting a buried utility line is a serious safety risk - and an expensive repair.
Post setting is the most critical step in how to build a privacy fence. Posts that aren't set correctly - too shallow, not plumb, or in poorly prepared holes - will cause the entire fence to fail over time.
Here's what proper post setting involves:
This is the step where most DIY fences go wrong. Posts set at the wrong depth, out of plumb, or without adequate concrete will lean, shift, and eventually fall - often within a year or two in climates with freeze-thaw cycling or expansive soils.
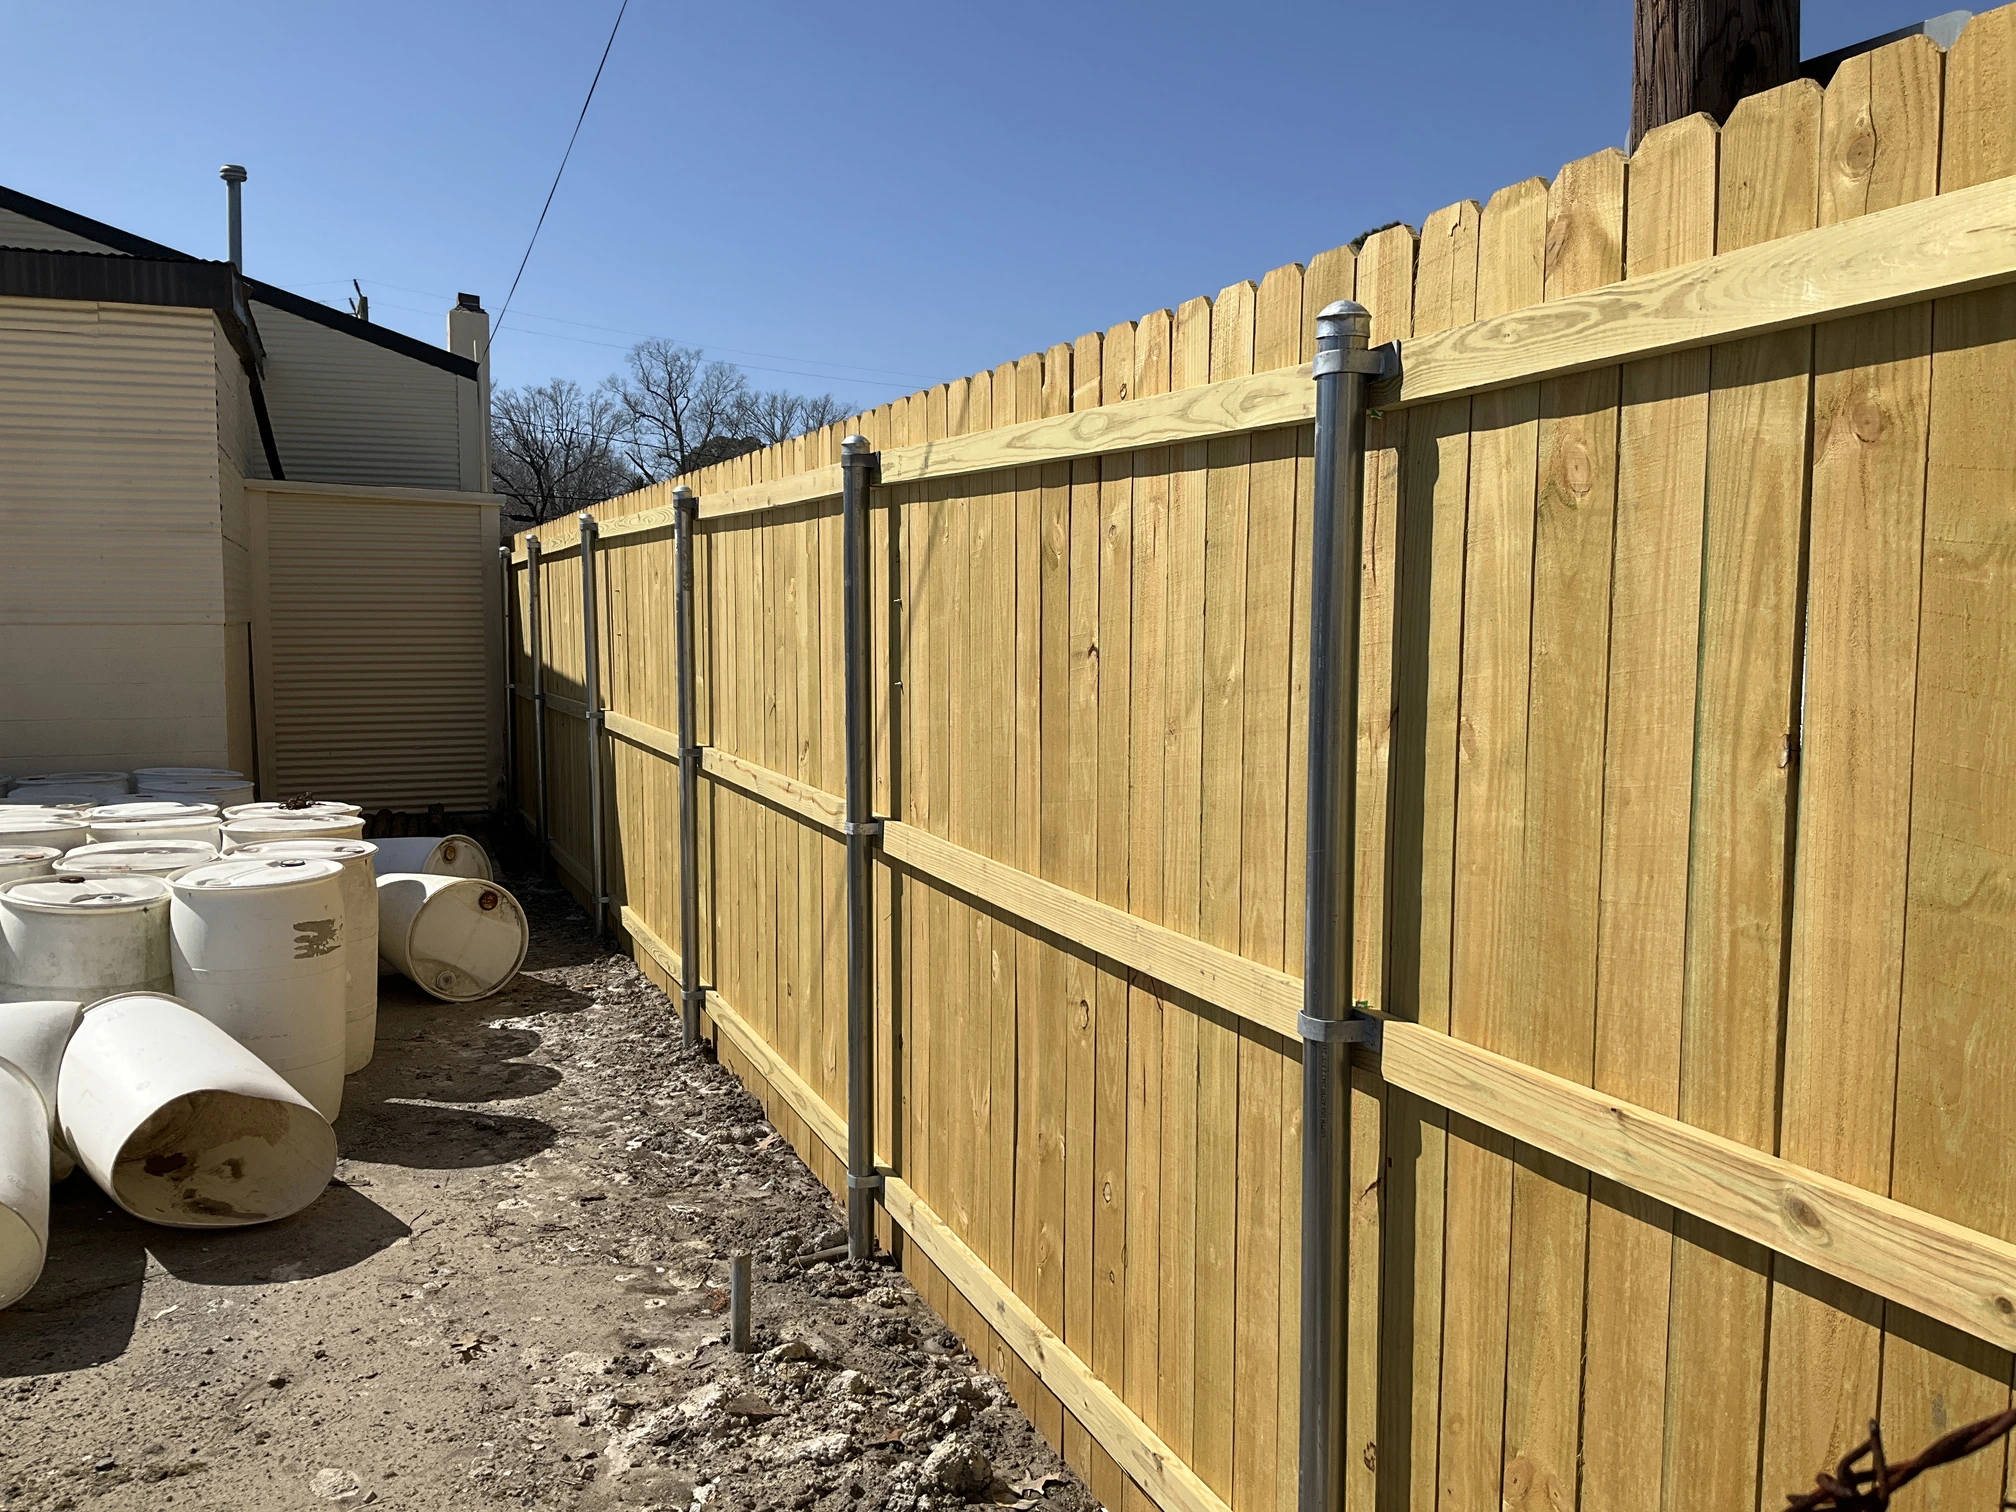
Once posts are set and cured, horizontal rails are attached between them. A standard six-foot privacy fence typically uses three rails - one near the top, one near the bottom, and one in the middle. Rails provide the structural framework that fence boards attach to.
Rails should be level and evenly spaced. Pre-cut lumber makes this easier, but uneven terrain requires adjustments that can add complexity to the installation.
Privacy fence boards - also called pickets or palings - are attached vertically to the rails, typically with galvanized screws or nails. For a solid privacy fence, boards are installed tight together with no gaps.
This step is time-consuming but relatively straightforward once posts and rails are in place. Consistent spacing, level installation, and straight lines make a significant difference in the finished appearance.
Gates require additional hardware - hinges, latches, and often additional structural support - and are one of the trickier parts of a DIY fence build. A gate that sags, drags, or doesn't latch properly is one of the most common complaints about DIY fence installations.
Proper gate installation means using heavy-duty hinges rated for the gate weight, a diagonal brace to prevent sagging, and a latch that operates smoothly and securely.
For wood fences, applying a sealant or stain after installation is an important final step. Unsealed wood absorbs moisture, which accelerates rot, warping, and cracking - particularly at the base of boards and the ground contact zone of posts. Apply sealant to all exposed surfaces, including cut ends, within a few weeks of installation.
The appeal of building your own privacy fence is primarily cost savings. But it's worth understanding the full picture before assuming DIY is always cheaper.
Materials: For a 150-foot wood privacy fence, expect to spend roughly $1,500 to $3,500 in materials depending on wood species, board grade, and hardware. Cedar costs more than pressure-treated pine but is naturally more resistant to rot and insects.
Tools: If you don't already own a power auger, post level, circular saw, and drill, tool rental or purchase adds to the cost. A one-day auger rental typically runs $75 to $150.
Time: A 150-foot fence typically takes an experienced DIYer a full weekend - often two to three days of physical work. First-timers should budget more time, particularly for post setting and gate installation.
Hidden costs: Permit fees, utility marking (free but requires scheduling), concrete disposal, and any corrections needed if posts are set incorrectly all add to the real cost of a DIY project.
Professional fence installation isn't just about paying someone else to do the work - it brings a set of advantages that are worth weighing carefully against the cost difference.
A professional fence contractor who works regularly in your area understands the local soil type, frost depth, permitting requirements, and HOA landscape. This knowledge directly affects installation quality. Posts set to the right depth for your specific soil and climate conditions will outlast posts set to a generic standard.
Professional crews use commercial-grade post hole augers that handle rocky or compacted soil far more efficiently than rental equipment. They also have jigs, levels, and alignment tools that produce consistent results across an entire fence line - something that's genuinely difficult to replicate without experience.
Most professional fence contractors handle permit applications on your behalf. This removes one of the more administratively tedious parts of the project and ensures the work is code-compliant from the start.
A professional crew can typically install a 150-foot privacy fence in one to two days. The same project takes most DIYers a full weekend or more, often spread across multiple sessions.
Reputable fence contractors stand behind their work. Labor warranties and material guarantees provide recourse if something goes wrong - a safety net that simply doesn't exist when you build it yourself.
Professional installation of a 150-foot wood privacy fence typically costs between $3,000 and $7,000 depending on the contractor, region, material grade, and project complexity. The premium over DIY materials cost covers labor, equipment, expertise, permitting, and the contractor's guarantee.
When you factor in the full value of your time, the risk of errors that require correction, and the long-term performance difference between a professionally set fence and a DIY installation, the gap between DIY and professional cost often narrows considerably.
Ready to get a professional quote? Contact us at Heartwood Fence and we'll provide a free, detailed estimate for your privacy fence project.
Neither option is universally better. The right choice depends on your specific situation.
DIY makes sense when:
Professional installation makes sense when:
The middle ground: Some homeowners choose to handle some aspects of the project themselves - sourcing materials, clearing the fence line, handling permit applications - while bringing in a professional for post setting and structural installation. This hybrid approach can reduce labor costs while ensuring the most critical parts of the installation are done correctly.
If you decide to build your own privacy fence, being aware of the most common mistakes will save you significant time and money.
The National Association of Home Builders recommends confirming local building codes and permit requirements before beginning any fence project, regardless of whether you're building it yourself or hiring a contractor.
Knowing how to build a privacy fence gives you the context to make an informed decision - whether that's picking up a post hole digger or picking up the phone to call a contractor.
For smaller, straightforward projects on flat terrain with a capable and patient DIYer at the helm, building your own privacy fence is absolutely achievable. For larger projects, challenging soil conditions, or homeowners who want the job done efficiently and correctly the first time, professional installation delivers value that more than justifies the cost.
Whichever path you choose, the most important factors are the same: proper post depth, quality materials, correct concrete work, and attention to local permitting requirements. Get those right and your privacy fence will serve your home well for decades.
Contact us today for a free quote and let's talk through what the right approach looks like for your specific property.
How long does it take to build a privacy fence yourself?
A 150-foot wood privacy fence typically takes an experienced DIYer two to three days. First-timers should budget more time, particularly for post setting and gate installation. Post concrete cure time adds at least one additional day before rails and boards can be attached.
Is it cheaper to build a fence yourself or hire a contractor?
DIY is generally cheaper in out-of-pocket costs, but the gap is smaller than most people expect when you factor in tool rental, permit fees, and the value of your time. Professional installation also reduces the risk of costly errors that require correction later.
What wood is best for a DIY privacy fence?
Cedar is the top choice for above-ground fence boards due to its natural resistance to moisture, rot, and insects. For posts going into the ground, use pressure-treated lumber rated UC4B or UC4C for ground contact. Avoid using standard pressure-treated lumber for posts - not all grades are rated for soil contact.
How deep should privacy fence posts be set?
As a general rule, one third of the total post length should be below ground. For a six-foot fence with eight-foot posts, that means posts should be set at least two feet deep. In areas with significant freeze-thaw cycling, posts should reach below the local frost line, which may require greater depth.
Do I need a permit to build a privacy fence?
In most jurisdictions, yes - particularly for fences over four feet in height. Check with your local building department before starting. HOA communities may have additional requirements around fence height, material, and placement.
Can I install a vinyl privacy fence myself?
Vinyl fence installation is more complex than wood because it uses pre-manufactured panels that require precise post spacing and specialized hardware. While DIY vinyl installation is possible, errors in post placement are harder to correct than with wood. Many homeowners who are comfortable with DIY wood fences still opt for professional installation when it comes to vinyl.


